Learn how to wrap a wrist effectively with our comprehensive guide. Manage wrist pain the right way and experience swift recovery.
Learn how to wrap a wrist effectively with our comprehensive guide. Manage wrist pain the right way and experience swift recovery.
Knowing how to wrap a wrist effectively is a valuable skill to aid minor injuries. A well-wrapped wrist can provide essential support if you've overexerted yourself in a workout or suffered an accidental sprain.
This comprehensive guide will take you through the step-by-step process of wrapping your wrist quickly before you consult a medical professional. Understanding this technique can help reduce inflammation and pain, contributing to a swifter recovery.
Let's check out what you need to prepare and how to do it properly from home.
To start, make sure to gather all these essentials:
Wrist Wrap or Bandage: Adhesive bandages and elastic wraps are common choices. You might opt for an athletic tape if you need more robust support. If you're an athlete with a history of wrist sprain, kinesiology tapes are ideal options. These stretchy tapes are meant to mimic the skin's elasticity to support muscles and joints, essential for preventative and recovery purposes.
Scissors: To cut the bandage or tape to the appropriate length.
Safety Pins or Tape: These will be used to secure the wrap in place. Some wraps will require clips or Velcro as support.
Once you have the materials ready, you can start following these steps.
Begin by understanding the necessity of wrapping your wrist. If you're experiencing persistent pain, swelling, or difficulty moving your wrist, a wrist wrap can provide relief.
However, wrapping a wrist is not a substitute for medical attention. Consult a healthcare professional if your pain is severe or continues for several days.
Various wrist wraps are available in the market, including adhesive bandages and athletic tapes. Here are the most common ones available:
Elastic Bandages: Known for versatility, they can be used for many injuries, including sprains and strains. They can be secured with clips or Velcro.
Athletic Tapes: Typically less flexible than elastic bandages and provide high support and stability. They are primarily used in sports and heavy activities for injury prevention and recovery.
Wrist Support Braces: These provide the highest level of support and are often used for more severe injuries or conditions like carpal tunnel syndrome. They are typically made from a combination of materials, including fabric, plastic, and metal, and often include a splint to keep the wrist in a neutral position.
Thermal Wrist Wraps: These types of wraps use heat or cold therapy to help reduce swelling and relieve pain. They are often used in conjunction with other wrap types for therapeutic purposes.
Compression Gloves: While not a traditional "wrap," compression gloves can support the wrist and are commonly used for chronic conditions such as arthritis or tendonitis.
Kinesiology Tapes: These are adhesive, stretchy tapes meant to mimic the skin's elasticity and are used to support muscles and joints, including the wrist. Athletes commonly use them for both preventive and recovery purposes.
Of these types, elastic bandages and athletic and kinesiology tapes are often the items you can install with minimal support. The rest will require assistance, likely from medical practitioners or trainers.
Position your wrist correctly. Ensure your wrist area is in a neutral and relaxed state. It should not be extended to prevent hyperflexion, which can result in further injuries.
Begin the wrap at the base of your thumb. Hold the end of the bandage in place with your other hand, and then wrap the bandage around your wrist twice, ensuring it's snug but not too tight. Remember, maintaining proper blood flow is crucial.
The Figure Eight technique offers excellent support to prevent a sprained wrist from worsening. Start by diagonally wrapping the bandage, moving from the base of the thumb to the top of the wrist and back to the base. Repeat this process until the entire wrist is covered.
After wrapping the entire wrist, secure the end of the wrap. Use the clips or Velcro that come with the wraps. Always remember to keep it snug but comfortable.
An adequately wrapped wrist should allow you to slide one or two fingers beneath the bandage. If it's too tight, it can restrict circulation, causing more harm than good.
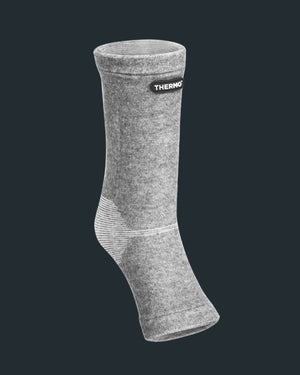
You should also ensure the wrap is even and covers the affected area. It should cover the base of your thumb to an inch below the crease of your wrist. A wrist sleeve might be helpful here.
Monitor your levels of discomfort and adjust the wrapping as necessary. If the pain persists or increases, consult a healthcare professional immediately. Your goal is to stabilize the wrist and alleviate discomfort, not exacerbate it.
Wrist injuries can vary in severity, and some require immediate medical attention. The following are common ones that can benefit from a preventative wrist wrap treatment:
Wrist Sprain: This occurs when the ligaments that support the wrist stretch or tear. Sprains are common injuries that can result from falls or twists.
Fractures: It is a break in one or more of the bones in the wrist, often caused by trauma such as a fall or a forceful hit.
Strains: These are caused by overuse or an overstretch of the muscles or tendons in the wrist.
Carpal Tunnel Syndrome: This results from pressure on the median nerve within the wrist, often because of repeated motions, like writing, typing, or any wrist movement that you do over and over.
Tendonitis: This is inflammation or irritation of the tendons in the wrist, often caused by repetitive movements or overuse.
A wrist is usually wrapped for 48 to 72 hours following an injury. This duration may vary depending on the sprain's severity or as a healthcare professional recommends.
Wrapping your wrist overnight is generally not advised as it can restrict blood flow. However, it can be done if a doctor recommends it as part of the treatment.
Wrapping a wrist can help reduce pain by providing support and stability to the injured area, thereby minimizing movement and further damage.
Knowing how to wrap your wrist effectively is an essential skill, especially for those involved in regular physical activities.
By identifying the need, choosing the appropriate wrap, correctly positioning the wrist, using the effective wrapping technique, securing the wrap, and monitoring afterward, you can aid in the management and recovery of wrist sprains or strains.
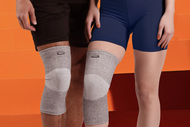
Looking for high-quality wrist support wear?
Check out our offer and find a suitable product for yourself!