


You buckle an ankle brace after a twist, expecting walking to feel easier. Instead, the ache climbs, the straps dig in, or your toes start tingling. You loosen it, wonder whether you've fitted it wrong, and consider pulling it tighter for more support.
If your ankle brace makes pain worse, don't push through it. The next step is to separate pressure from the device from pain that needs the ankle itself reassessed. A brace can be useful without being comfortable, suitable, or sufficient for your particular injury.
Table of Contents
- When Worsening Pain Means Take the Brace Off
- Settle the Ankle After You Remove the Brace
- Why a Supportive Brace Starts to Hurt
- Fit Timing and Pressure Checks You Can Do Today
- A Wear Plan That Does Not Replace Rehab
- Matching the Support Type to the Pain Source
- Switch to a Non-Compression Sleeve When the Squeeze Is the Problem
When Worsening Pain Means Take the Brace Off
Remove the brace if pain increases after you put it on, your foot tingles or goes numb, skin becomes pale, blue, or blotchy, deep pressure marks appear, or swelling increases underneath it. Stop walking while you assess what's happening. Don't tighten another strap to counter a new symptom.
For a removable support, taking it off lets you check the skin and prevents continued pressure. If you've been prescribed immobilization after surgery or a fracture, keep the ankle protected and contact your treating team promptly rather than walking without the prescribed device.
Match the symptom to the next move
The distinction is whether discomfort follows the brace's contact points or continues inside the ankle after removal. Neither pattern proves a diagnosis, but it helps determine whether a cautious refit is reasonable or medical assessment should come first.
Ankle brace pain triage
| What you notice | Usual meaning | Do this now |
|---|---|---|
| Pain eases as soon as the brace is loosened | Too much pressure or the wrong size | Remove it, remeasure, and don't retighten the same painful fit |
| Hot spot, blister, or rub line inside the shoe | Friction or shoe incompatibility | Stop wear, check the skin, and arrange padding or a device change without adding pressure |
| Brace feels fine at first, then tighter as the ankle swells | Edema increasing under a fixed shell | Take it off until swelling settles; use loose protection only if appropriate for your injury |
| Numbness, cold foot, color change, or deep pressure marks | Possible circulation or nerve pressure | Remove immediately and get clinical advice; persistent coldness, discoloration, or loss of feeling needs urgent assessment |
| Joint pain worsens with every step even after removal | Possible fracture, tendon injury, or wrong diagnosis | Stop self-adjusting and seek assessment; a clinician may recommend imaging if pain persists |
| Cannot bear weight, wound, fever, or rapidly rising swelling | A red flag beyond fit | Seek urgent clinical care, not another brace |
A band-like ache that disappears when a strap releases suggests pressure. A scraped feeling along the shoe collar suggests rubbing. Neither is a reason to cinch the device tighter.
Deep joint pain is different. If every step still hurts after removal, changing to a smaller brace won't establish whether you have a sprain, fracture, or tendon injury. Persistent pain deserves reassessment, even if an earlier examination seemed reassuring.
Supportive shouldn't mean constricting
The fitting guidance in Everyday Health's ankle-brace guide includes allowing a finger between the brace and skin and checking that the device fits your usual footwear. Treat that as a screening check, not proof that circulation and alignment are safe.
Severe pain, inability to bear weight, an open wound, fever, spreading redness, or rapidly increasing swelling moves the decision away from home fitting. A cold, discolored foot that doesn't promptly normalize after removal needs emergency assessment.
Stop-wear rule: New pain, numbness, or skin injury isn't a break-in requirement. Follow the matching action before trying the brace again.
Settle the Ankle After You Remove the Brace
Once the painful brace is off, resist the urge to order another device immediately. First, give the ankle a chance to settle and notice which symptoms remain. Keep the straps off while you check warmth, color, feeling, and the areas where the shell touched.
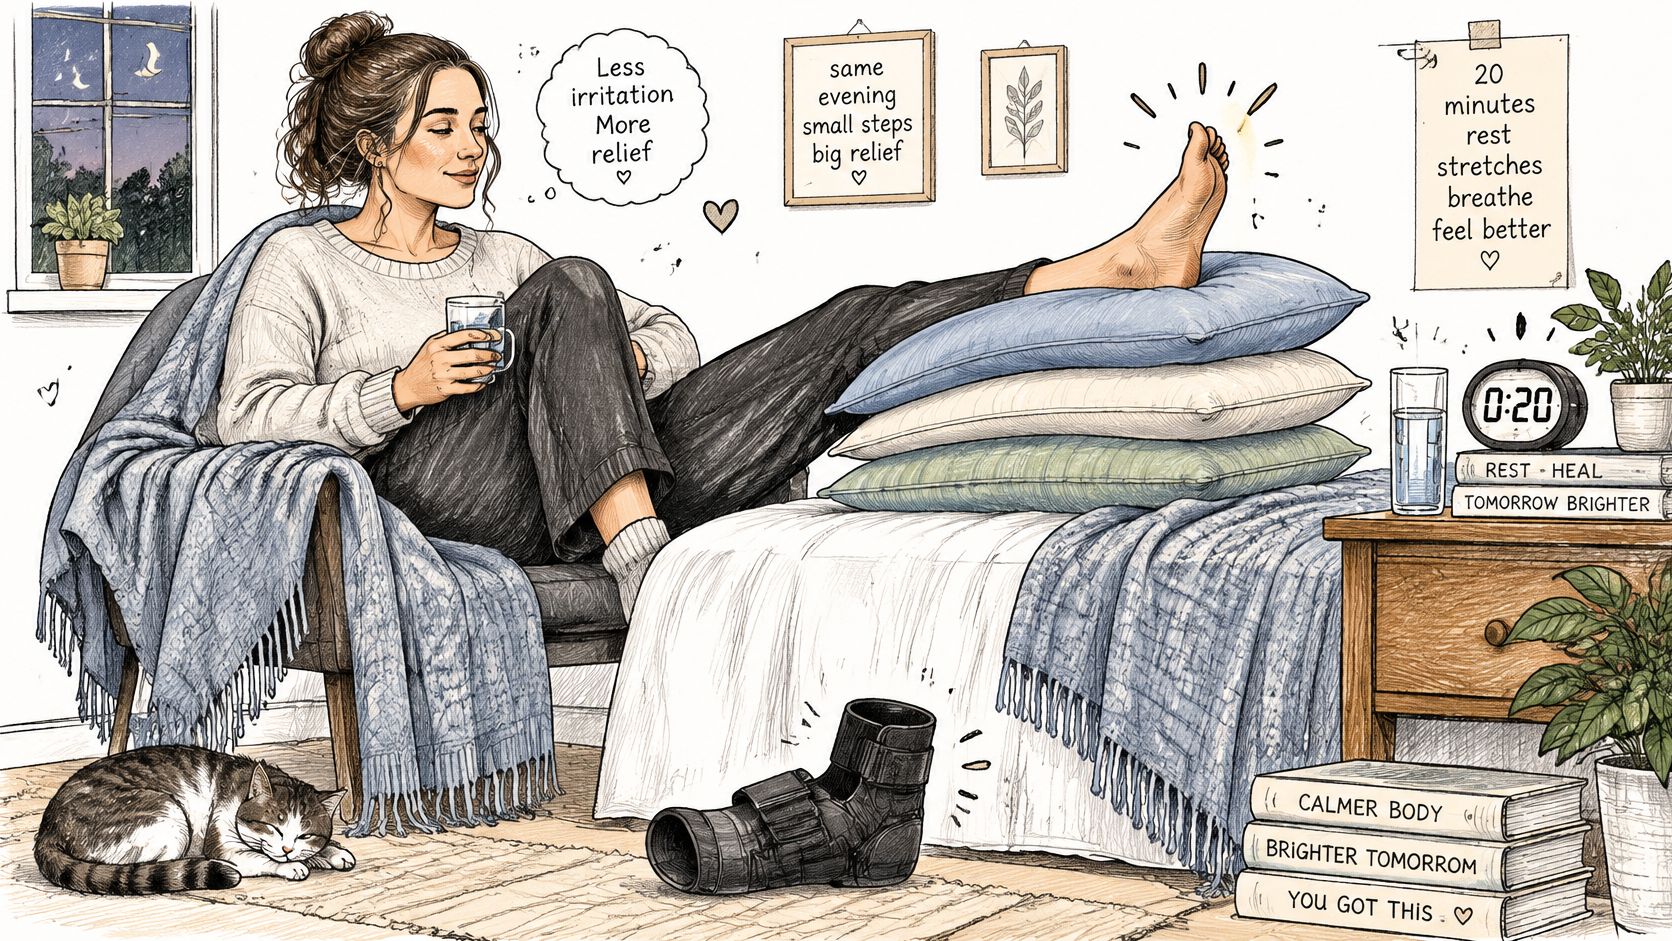
Make the evening simpler
Rest with the leg supported on pillows, preferably above heart level when comfortable. Avoid putting a pillow edge directly beneath an already sore pressure point. Elevation should feel restful, not produce pulling or numbness.
- Cool irritated tissue gently: Use a cool pack wrapped in cloth, checking the skin frequently. Don't apply ice directly, and don't cool numb skin or a foot with abnormal circulation.
- Reduce unnecessary walking: If your clinician has allowed weight bearing, use the walking aid already prescribed to you. Don't force a normal stride through sharp pain.
- Check the surface: Look for scraped skin, blisters, dents, and tender patches. A photograph can help you show a clinician exactly where the brace pressed.
Our guide to hot and cold therapy explains how to choose between cooling and warmth. A newly swollen ankle isn't a reason to add strong heat just because warmth feels comforting elsewhere.
Separate surface soreness from joint pain
A burning patch where the shell sat points toward skin irritation. A deep ache that builds whenever you load the foot needs a different conversation, particularly if removing the device hasn't helped.
Ask a pharmacist or clinician about suitable pain relief, especially if you take other medicines or have medical conditions. Medication may ease symptoms, but it won't correct a pinched nerve, unsafe pressure, or an undiagnosed fracture.
Sleep without the painful removable brace unless your clinician has specifically prescribed overnight protection. If overnight support is required but hurts, contact the treating service for instructions.
At the next check, fading marks and easier movement suggest the device contributed to the discomfort. They don't prove the underlying injury is minor. Worsening symptoms should prompt care, not another fitting experiment.
Why a Supportive Brace Starts to Hurt
A brace should guide the ankle the way a loose hand guides a garden hose, not pinch it until flow and feeling drop. The goal is to limit an unwanted movement while leaving the surrounding tissues comfortable. More squeeze doesn't automatically mean more useful stability.
A device can also fit correctly when you first apply it and become uncomfortable later. Swelling, footwear, activity, and strap placement all change the pressure against your skin.
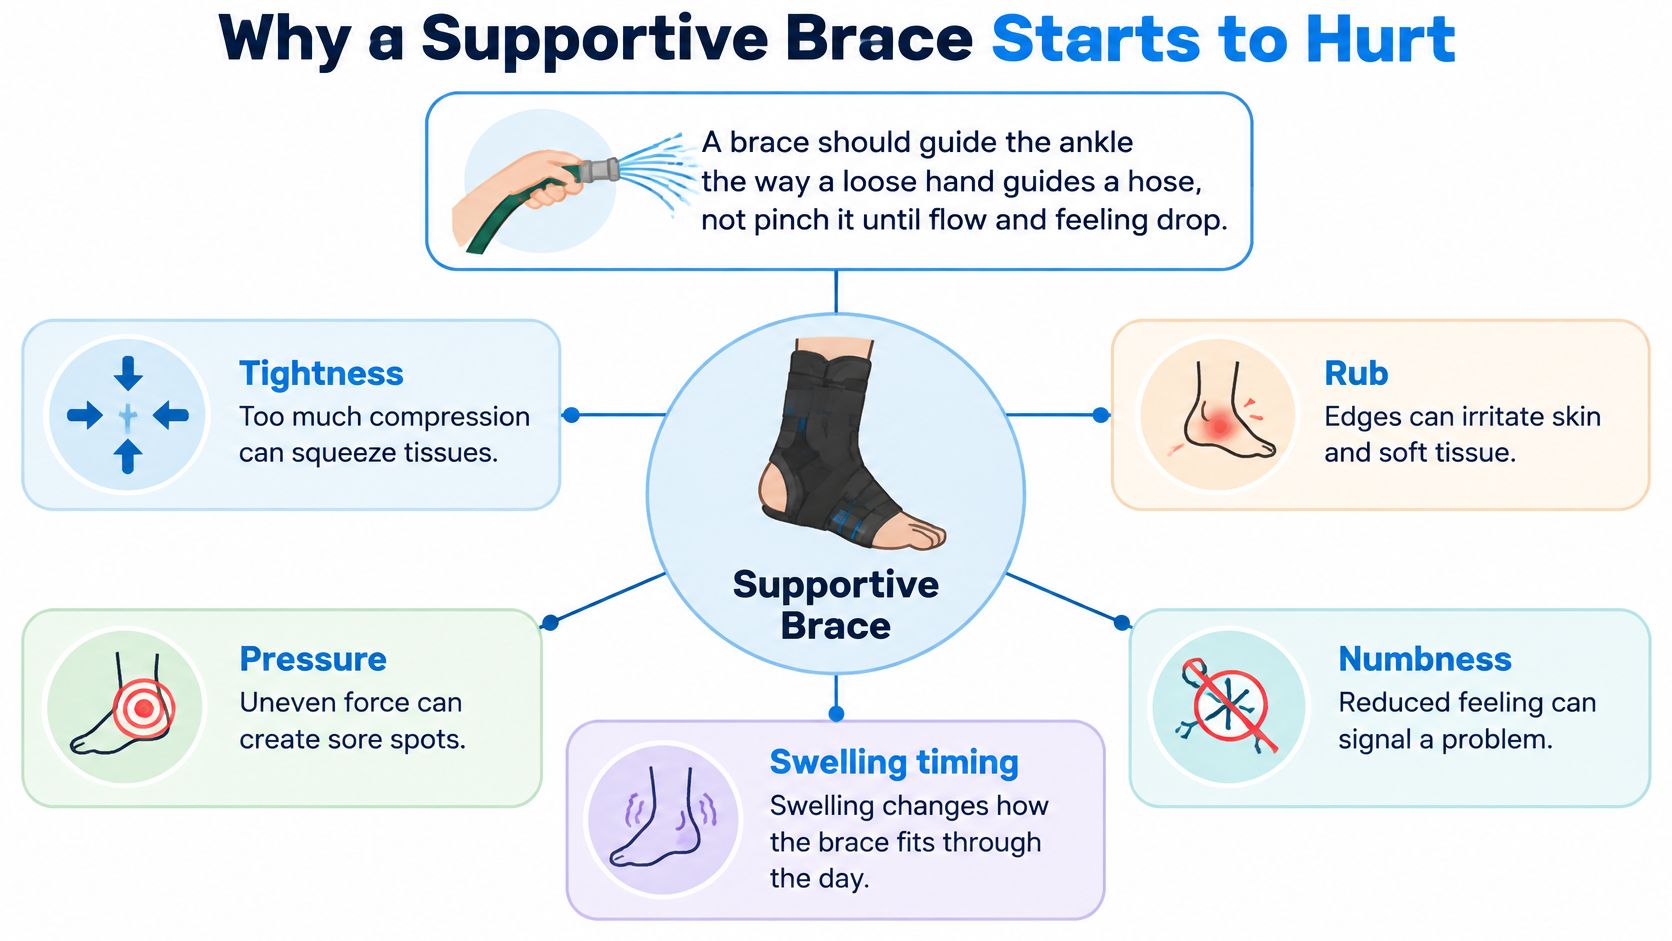
Pressure, rubbing, and restricted movement
Several mechanisms can overlap:
- Excess compression: A tight strap concentrates force against soft tissue instead of controlling ankle movement.
- Misalignment: A stirrup or hinge that sits forward of the ankle bones can press or pull in the wrong place.
- Friction: Repeated sliding between skin, sock, brace, and shoe can produce a hot spot or blister.
- Changing swelling: Fluid accumulating beneath a fixed shell leaves less room for the ankle.
- Prolonged restriction: Holding the ankle still can contribute to stiffness, making the first unsupported movements uncomfortable.
Say the brace feels comfortable while you're seated, but its outer edge burns during a walk. The problem may be repeated rubbing inside the shoe, not inadequate ankle support. Tightening the straps could hold that edge more firmly against the irritated skin.
Stabilization isn't the same as pain relief
A pragmatic randomized trial published in 2009 enrolled 584 adults with severe ankle sprains, applied the treatments 2–3 days after presentation to allow acute swelling to resolve, and found that the below-knee cast had a small pain advantage over the Aircast brace at four weeks: 5.1 points on the Foot and Ankle Outcome Score pain measure, with a 95% confidence interval of 0.4–9.8. The trial compared a tubular bandage, cast, Aircast brace, and Bledsoe boot; the brace wasn't automatically superior on the main recovery measures.
In a smaller randomized ankle-sprain trial involving 50 patients, an Aircast brace didn't demonstrate a statistically reliable pain advantage over an elastic bandage, with p = 0.07 for pain. That doesn't establish that the devices are equivalent, but it does challenge the assumption that a more structured support must hurt less.
These findings don't show that braces generally worsen pain. They show why treatment choice needs to account for the injury, timing, fit, and individual tolerance.
A brace can control movement without treating every reason the ankle hurts.
An unrecognized fracture, tendon injury, nerve irritation, or circulation problem can all feel like a failed brace. Persistent or escalating pain needs an explanation, not just a stronger device.
Fit Timing and Pressure Checks You Can Do Today
Home refitting is appropriate only when the problem appears to be pressure, rubbing, or changing swelling, without red flags. Don't use this sequence to troubleshoot numbness, a cold or discolored foot, broken skin, or an ankle you can't bear weight on.
Before starting, place the brace, its size chart, a flexible measuring tape, a smooth sock, and your actual walking shoe together. Testing the device without the shoe misses a common source of discomfort.
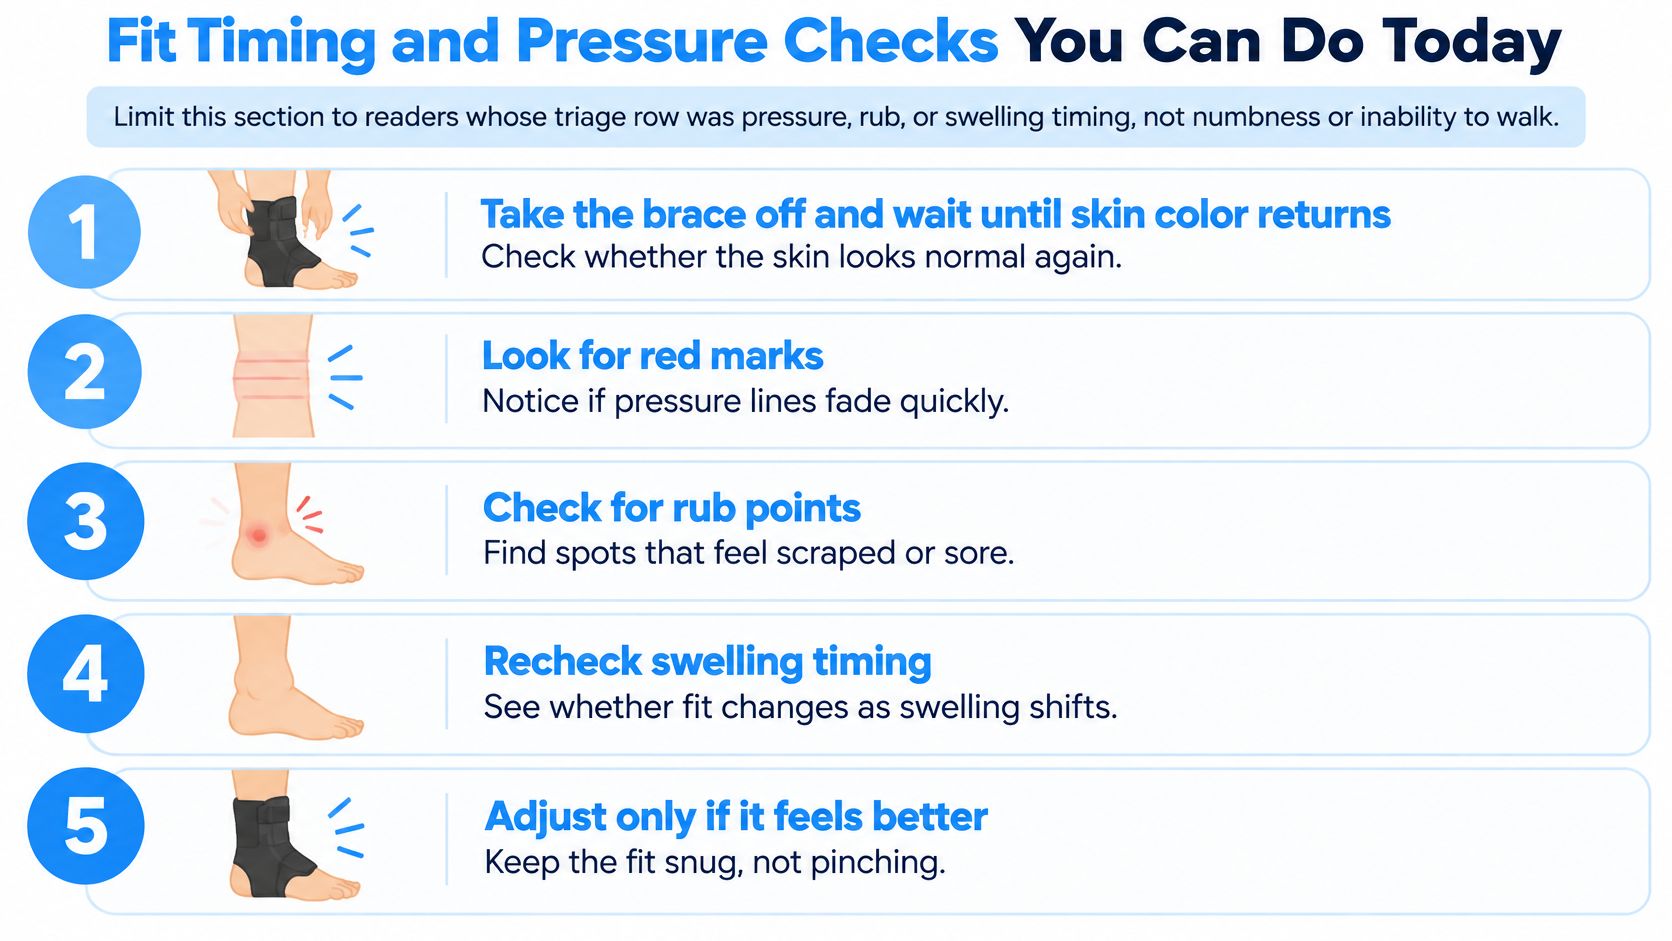
Check the whole setup
- Start with bare skin. Remove the brace and inspect the ankle. Don't continue if color or sensation is abnormal, or if the skin is injured.
- Measure where the manufacturer specifies. Some designs use ankle circumference; others use a heel-to-instep measurement or shoe size. Follow the illustrated landmarks rather than substituting a measurement from another brand.
- Compare with the other ankle. Notice how much swelling changes the shape around the ankle bones and instep. Buy for the measurement of the injured side, not an assumption that both sides still match.
- Smooth the contact layer. If the device instructions allow a sock, choose a thin, wrinkle-free one. Keep seams away from tender spots, center the heel, and align any hinges or stirrups as directed.
- Add the actual shoe. Open the laces sufficiently to accommodate the brace without squeezing the foot. A lifted heel, folded tongue, or compressed toe box means the combination needs changing.
- Test gently and inspect again. If walking is permitted, take a short, easy walk indoors. Stop for a new hot spot or increasing pain, then remove the device and check the contact areas.
Our guide to how to put on an ankle brace offers additional help with positioning and strap order. Don't compensate for a slipping heel by tightening every strap indiscriminately.
Account for swelling before blaming the size
A rigid device leaves little room for a changing ankle. If swelling is still increasing, a comfortable fit may not remain comfortable, even when you followed the size chart correctly.
Don't stuff thick padding into an already crowded brace. Padding can help redistribute pressure when fitted appropriately, but adding bulk can also increase it.
Refit boundary: Try a careful correction, not repeated tightening experiments. If the corrected fit still hurts, stop and have the device and ankle assessed.
A Wear Plan That Does Not Replace Rehab
Pain after taking a brace off can reflect weakness and stiffness rather than damage caused by the brace. It can also mean the injury hasn't recovered sufficiently. You can't distinguish those possibilities by putting the support back on and noticing relief.
Support should make appropriate movement possible, not replace rehabilitation. The aim is to restore the ankle's ability to move, bear load, and respond when the ground changes.
Use recovery stages, not an all-day habit
The American Academy of Family Physicians' guidance on acute ankle sprains describes early support for roughly 5–10 days alongside an 8–12-week rehabilitation program, with functional support commonly used for 4–6 weeks and sports-related recurrence prevention potentially continuing for 6–12 months. The following is a practical framework built around those windows, not a substitute for an injury-specific prescription.
Ankle support by recovery stage
| Stage | Typical window | Support | Movement to keep |
|---|---|---|---|
| Swelling control | While swelling is actively increasing | Loose protection only when clinically appropriate, not a painful tight shell | Elevation and relative rest; no forced walking through sharp pain |
| Early support | Early recovery, once swelling permits | Comfortable external support | Short walks and gentle range of motion as allowed |
| Functional rehab | As walking and controlled loading improve | Brace or tape for uneven ground and higher-risk tasks | Strength, balance, and gradual reduction of all-day wear |
| Return to full activity | During completion of rehabilitation | Support for sport or unstable surfaces when indicated | Complete the strength and proprioception plan |
| Recurrence prevention | Longer term if sprains repeat | Support during sport rather than automatically all day | Maintain strength work; seek reassessment if unsupported pain returns |
These stages overlap. A severe sprain, fracture, tendon injury, or postoperative ankle may require different restrictions, including prescribed immobilization.
Keep movement in the plan
Proprioception is your sense of where the ankle is positioned. Rehabilitation uses controlled balance tasks to improve that awareness, alongside exercises that restore motion and strength.
For example, you might wear a comfortable prescribed support for a grocery trip but remove it for seated ankle alphabet movements. Later, once cleared for balance work, you might practice supported single-leg standing at the kitchen counter rather than relying on the brace for every household task.
Use our ankle mobility exercises as a starting point for discussing movement with your clinician. Arizona Valley Acupuncture's resource on returning to sport after injury can also help frame the transition from everyday comfort to activity-specific demands.
Reduce support according to comfortable function, not determination alone. If pain or swelling rises during the taper, pause and get reassessed rather than abandoning rehabilitation or living indefinitely in the brace.
Matching the Support Type to the Pain Source
Choose a support by what your ankle needs and what your skin tolerates, not by how substantial the product looks. A rigid boot and a soft sleeve do different jobs. Neither is an automatic upgrade over the other.
The comparison below describes possible discomfort, not a prediction that every wearer will experience it. The injury diagnosis still determines how much protection is appropriate.
Compare the job each device does
Support type by pain source
| Support type | Pain it tends to cause | Best use | Avoid when |
|---|---|---|---|
| Rigid walking boot | Heel lift, tongue bunching, strap pressure, stiffness | Clinician-directed protection after serious injury | Self-fitting without clinical direction |
| Hinged or stirrup brace | Rubbing at the ankle bones, pressure from misalignment | Higher-risk tasks after early swelling settles | Peak swelling or any color or nerve change |
| Soft lace-up brace | Strap pressure and rubbing inside footwear | Selected mild sprains with early walking, including uneven ground | Pressure marks or numbness after fitting |
| Compression sleeve | Squeezing and skin irritation | Light support when compression is tolerated | Blistering or increasing swelling underneath |
| Non-compression sleeve | Possible fabric irritation, with less mechanical stability | Rest and light activity when compression is the problem | Sport or uneven ground when meaningful stability is required |
A walking boot should be fitted as part of a treatment plan. Don't choose one just because a lace-up brace feels inadequate. Extra restriction can introduce different problems without addressing the reason for the pain.
A hinged or stirrup brace offers movement control, but its position matters. A soft lace-up design is more flexible, yet the laces and shoe can still create substantial pressure across the instep.
Location matters as much as device type
Pain behind the ankle deserves attention to the heel counter, rear straps, and Achilles region. Our guide to posterior ankle pain causes, symptoms, and treatments explains why discomfort there isn't always a simple fitting issue.
A non-compression sleeve may remove an irritating squeeze, but it won't provide the same restraint as a functional brace. No sleeve or brace substitutes for assessment of a suspected fracture, tendon injury, or nerve problem.
Switch to a Non-Compression Sleeve When the Squeeze Is the Problem
Changing the kind of garment can make more sense than repeatedly buying tighter supports. That applies when compression itself causes discomfort and a clinician has ruled out symptoms needing treatment. It doesn't apply when the ankle requires prescribed immobilization or keeps giving way.
A non-compression sleeve is most relevant for rest and light activity, where comfort matters more than restricting an ankle roll. Choose it for that limited role rather than expecting it to behave like a rigid brace.
Decide what you're replacing
Our explanation of non-compression versus compression sleeves can help you distinguish a contact garment from a garment intended to squeeze. Check the description carefully, because a soft-looking sleeve can still apply compression.
- Replace an irritating squeeze: Consider a non-compressive option when elastic pressure is the main problem.
- Keep prescribed stability: Don't replace a required brace with a fabric sleeve without clearance.
- Continue active recovery: Comfortable clothing is an adjunct to the movement and loading plan, not the rehabilitation itself.
Our Thermo Lite Recovery Ankle Sleeve is currently $24.99 and uses semiconductor-embedded fabric intended to ease discomfort through skin contact rather than compression. That intended benefit is our product claim, not independently verified evidence that the sleeve treats ankle sprains; we offer U.S. shipping and a 30-day return window if the feel isn't right.
Judge it by comfort and function
Try a new garment during a low-demand period when you can inspect the skin and remove it easily. Stop if it irritates the ankle, traps uncomfortable warmth, or encourages you to walk farther than the injury tolerates.
Don't go back to a rigid brace just because it feels more medical. Use meaningful stability for the tasks that need it, under your treatment plan, and allow comfortable movement where it's appropriate. The best choice is the least restrictive option that still meets the ankle's actual needs.
Thermo Recovery Wear offers non-compression recovery garments for people who find tight supports uncomfortable. If pressure is your main problem and medical red flags have been ruled out, visit Thermo Recovery Wear to review the ankle sleeve's materials and sizing before choosing an option for rest and light activity.


