


You wake up, roll toward the edge of the bed, and brace yourself for the first few steps. Your knees feel stiff, your hips resist, or your ankles seem slow to respond. You make coffee and hope the ache fades by midmorning, but the day already feels smaller because you're calculating which movements might trigger another flare.
Learning how to help joint pain starts with abandoning the search for one perfect fix. A pill, brace, exercise, or heating device may help, but lasting improvement usually comes from a practical routine that combines movement, strengthening, warmth, recovery support, pacing, sleep, and nutrition. The right plan should make daily activity more manageable without demanding that you ignore pain or push through sharp symptoms.
Table of Contents
- Why Joint Pain Needs a Layered Plan
- Common Mistakes That Make Joint Pain Worse
- A Simple Daily Exercise Routine for Stiff Joints
- Using Heat, Cold, and Infrared-Style Support
- Pacing Activity and Modifying Daily Tasks
- Sleep, Nutrition, and Weight Habits That Reduce Pain
- Your Starter Week and What to Do If Pain Persists
Why Joint Pain Needs a Layered Plan
Joint pain isn't one simple signal. Osteoarthritis can affect cartilage, muscles, tendons, movement patterns, and the way the nervous system processes discomfort. The World Health Organization's osteoarthritis overview reports that about 528 million people worldwide were living with osteoarthritis in 2019, with the knee identified as the most affected joint at 365 million cases. That scale makes joint pain a common long-term health problem, not an isolated inconvenience.
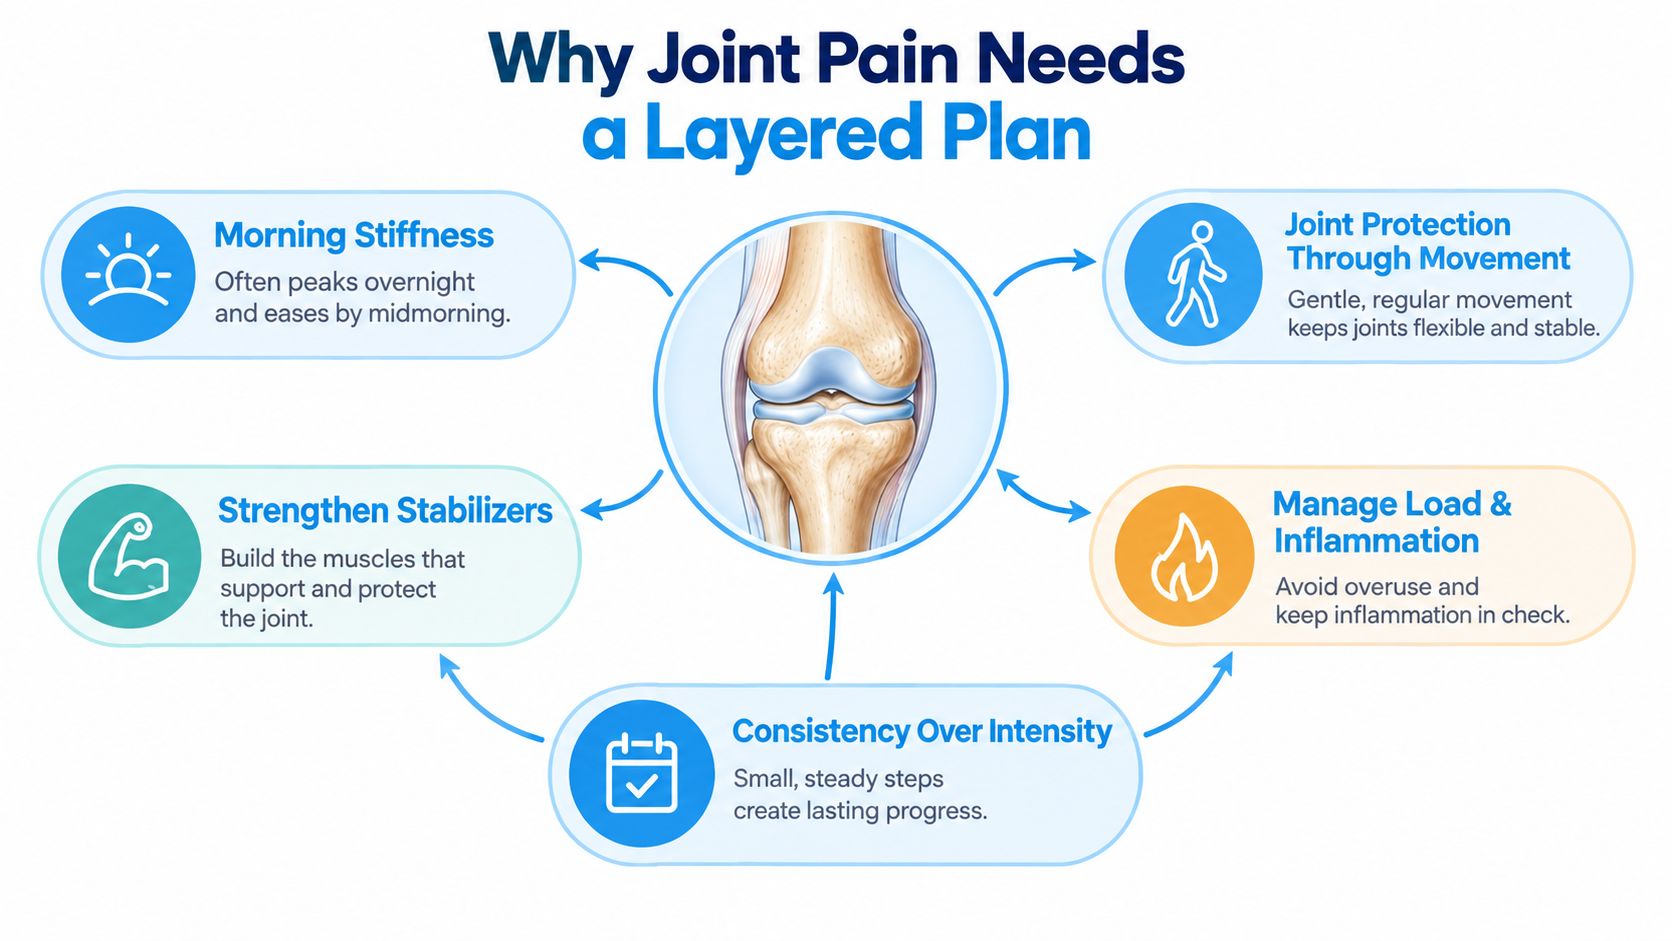
A layered plan works because each layer addresses a different part of the problem. Gentle movement helps preserve range of motion. Strengthening gives the joint better muscular support. Heat can make stiff movement easier, while cold can calm a recently irritated or swollen area. Pacing controls the total load, and sleep and nutrition influence how well you recover between active days.
Build the routine around consistency
Start with the habit you can repeat on an ordinary day, not the routine you can manage only when motivation is high. The CDC's arthritis activity guidance recommends at least 150 minutes of moderate-intensity aerobic activity each week, alongside muscle-strengthening activity on at least two days per week. You don't need to reach that target immediately, especially during a flare. Use it as a direction for gradual progress.
A useful order is simple: warm the joint, move through a comfortable range, strengthen the muscles that support it, then recover. If you want more practical ideas for daily mobility, improve mobility with expert tips can complement a clinician-guided routine.
For condition-specific background, review this guide to common joint diseases. It can help you distinguish a familiar stiffness pattern from symptoms that deserve a medical assessment.
Practical rule: Consistency beats intensity. A manageable routine repeated regularly is more useful than a demanding workout followed by several days of avoidance.
Common Mistakes That Make Joint Pain Worse
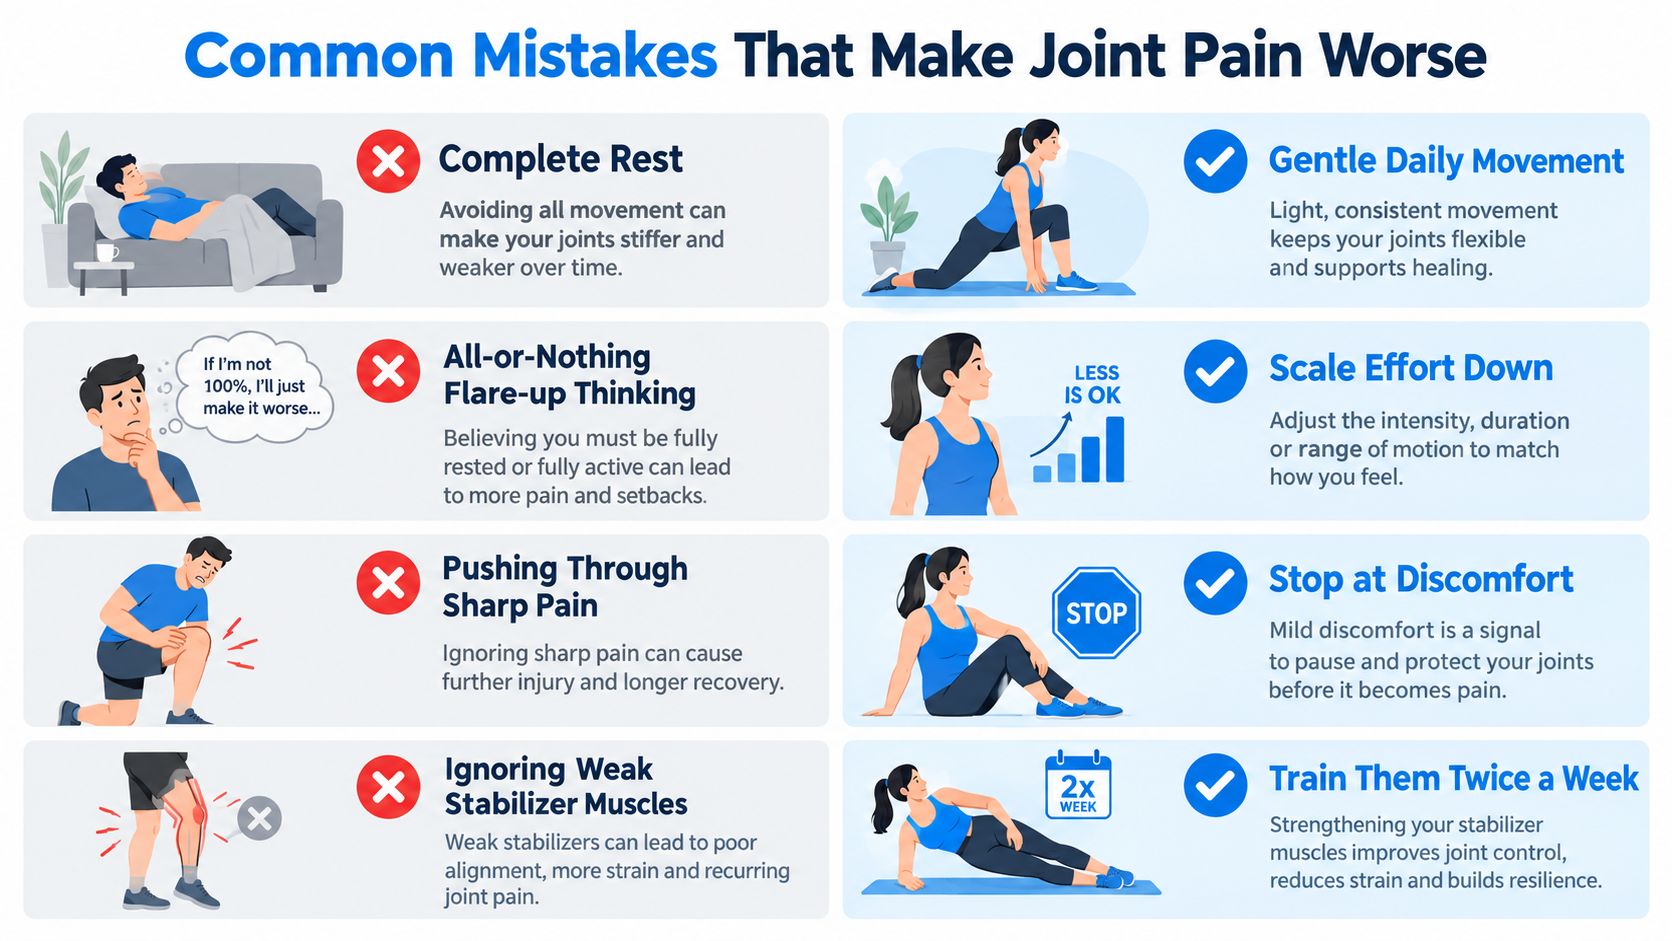
Complete rest feels sensible when a joint hurts. It often isn't. Avoiding movement can leave the muscles around the joint less prepared for walking, stairs, lifting, or standing, which can make ordinary tasks feel harder. The better response is relative rest, reduce the aggravating load while keeping gentle movement in your day.
The opposite mistake is the boom-and-bust cycle. You feel better, catch up on chores, take a long walk, or exercise aggressively, then spend the next day guarding the joint. Stop treating good days as permission to spend all your available energy. Keep the activity dose steady enough that your symptoms remain predictable.
Replace the reflex with a better response
- Total rest: Take short, easy walks or perform gentle range-of-motion movements instead of staying still all day.
- All-or-nothing exercise: Reduce duration, resistance, or range on a difficult day, but keep the habit alive.
- Pushing through sharp pain: Stop a movement that creates sharp, catching, or escalating pain. Mild effort discomfort isn't the same as a warning signal.
- Ignoring stabilizer muscles: Train the muscles around the hip, knee, ankle, shoulder, or wrist with controlled resistance rather than relying on a brace for every task.
- Using heat for everything: Choose warmth for stiffness, but consider cold after a flare or activity that leaves the joint swollen or hot.
- Ignoring the next morning: Track how the joint feels later that day and after sleep. A routine that looks tolerable during exercise may still be too demanding if symptoms remain high afterward.
Braces and sleeves can provide useful support, but they shouldn't replace strength and movement unless a clinician has given you a specific reason to restrict activity. Match the support to the task, and remove it if it causes numbness, skin irritation, or increased discomfort.
A Simple Daily Exercise Routine for Stiff Joints
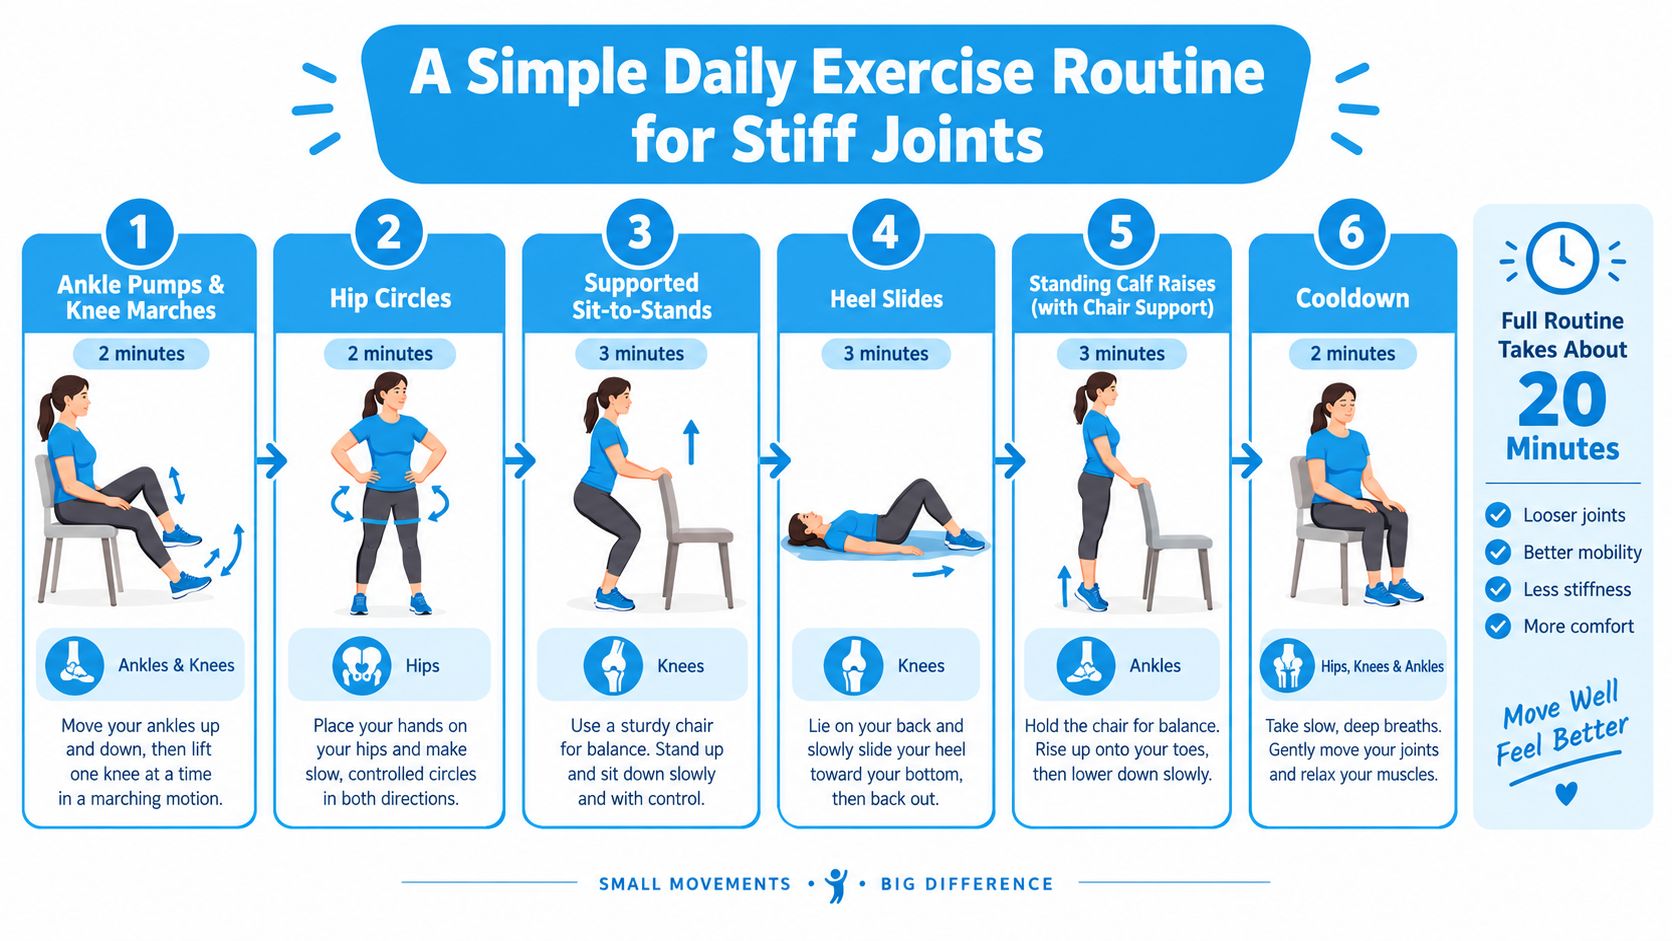
Use a stable chair, supportive shoes, and a clear floor. The routine below takes about 20 minutes and focuses on hips, knees, and ankles with controlled, low-impact movements. The University of Washington arthritis exercise guide recommends exercising once or twice daily with 3 to 10 repetitions, building toward 20 to 30 minutes at least three times per week, while using warmth before exercise and ice afterward when appropriate.
Follow the sequence
- Wake up the ankles and knees for two minutes. Sit tall and alternate ankle pumps, pointing and flexing each foot. Add gentle knee marches by lifting one foot a small distance, then switching sides. Keep the motion smooth rather than forcing a high lift.
- Perform heel slides for 10 repetitions per leg. Lie on your back or sit with your legs supported. Slide one heel toward your body until you feel a comfortable stretch, then return it slowly. This encourages knee motion without placing your full body weight through the joint.
- Add seated straight-leg raises for 10 repetitions per leg. Sit near the front of a chair, straighten one leg, and lift it until it reaches a comfortable height. Hold for two seconds, lower with control, and switch sides. Keep breathing instead of holding your breath.
- Use chair-supported mini-squats for two sets of 8. Stand behind a sturdy chair, keep your feet comfortable, and bend your knees slightly as if you're about to sit. Push through your feet to return upright. Stay within a pain-free or manageable range, and don't let the knees collapse inward.
- Finish strengthening with calf raises for two sets of 12. Hold the chair, rise onto the balls of your feet, pause briefly, then lower slowly. Keep your weight balanced across both feet.
- Stretch the front and back of each thigh. Perform a gentle quad stretch and hamstring stretch, holding each for 30 seconds per side. Don't bounce or pull into a sharp sensation.
The progression rule is straightforward. If a movement feels easy for three consecutive sessions, add two repetitions or use a light ankle weight. If pain rises above 4 out of 10, reduce the range or resistance and return to the easier level for two days. Exercise should leave you feeling worked, not threatened by the next step.
For readers who want more movement variety, at-home bear crawl exercises offer a more demanding option, but they aren't a starting point for an irritated weight-bearing joint. Keep that distinction clear. You can also use these knee mobility exercises to build a broader, joint-specific routine.
Using Heat, Cold, and Infrared-Style Support
Heat and cold solve different problems, so don't use them interchangeably. Warmth is for stiffness and preparation, while cold is more useful when a joint feels recently irritated, swollen, or unusually hot after activity. A warm towel, microwavable wrap, or heated pad can make a morning mobility routine more comfortable.
Use a cloth barrier between the skin and any hot or cold source. Keep each session to roughly 15 to 20 minutes, and check the skin afterward. Stop if you notice burning, marked redness, numbness, or worsening symptoms. People with reduced sensation or circulation problems should ask a clinician before using these methods.
The Mayo Clinic osteoarthritis treatment guidance advises using heat for about 20 minutes before activity and applying ice for up to 20 minutes afterward if the joint is swollen. That gives you a useful decision rule:
| What you notice | Start with | Why |
|---|---|---|
| Morning stiffness | Moist heat or a warm shower | Helps the joint feel easier to move |
| Recent swelling after activity | Cold with a cloth barrier | Calms the irritated area |
| Stiffness during a workday | Gentle warmth | Supports movement without interrupting the task |
| Repeated discomfort during light activity | A properly fitted sleeve or wrap | Adds warmth and physical awareness while you move |
Where infrared-style support fits
Infrared-responsive recovery sleeves and wraps are designed to provide sustained, low-level warmth through the fabric. They can suit people who dislike tight compression or who want support during light activity, work, walking, or rest. They aren't a replacement for diagnosis, strengthening, or load management, and you should stop wearing any product that causes skin irritation, numbness, or pressure discomfort.
Fit matters more than marketing language. The sleeve should stay in place without restricting circulation, bunching behind a joint, or changing your walking pattern. Use it as an adjunct to the routine, not as permission to increase activity beyond what the joint can tolerate. For a broader comparison of approaches, see this guide to hot and cold therapy.
Pacing Activity and Modifying Daily Tasks
Pacing means deciding how much activity your joint can handle before you begin. It isn't laziness, and it isn't a reason to avoid movement. It's a way to keep your muscles active without repeatedly exceeding your recovery capacity.
Use a simple stop rule: if pain rises beyond 3 out of 10 during a task or is worse the next morning, shorten the next session by a quarter. Don't wait until the joint is already throbbing. Early adjustments are easier than recovering from a full flare.
Change the task before you change your goals
Carry groceries in two lighter trips instead of one heavy load. Use both hands to open a stubborn jar, or choose a jar opener that reduces twisting through the wrist. On a difficult walking day, use low-impact cycling if the movement feels comfortable, and adjust a desk or kitchen workstation so your knees, hips, elbows, and wrists aren't held at painful end ranges.
Break chores into blocks. Vacuum one room, sit briefly, then decide whether another room makes sense. During a walk, turn around while your gait is still smooth rather than waiting until every step becomes guarded. Good pacing preserves movement quality, and movement quality protects the muscles that help stabilize a joint.
A realistic day might look like this:
- Morning: Warm shower, gentle mobility, and a short walk around the home.
- Midday: One focused chore, followed by a planned seated break.
- Afternoon: The exercise routine or low-impact cycling, adjusted to symptoms.
- Evening: Light stretching, cold only if the joint is swollen, and a written note about the next-morning response.
Stop rule: End the task while you still have enough control to move normally. Pain that changes your gait or makes you hold your breath is a clear signal to scale back.
Sleep, Nutrition, and Weight Habits That Reduce Pain
A joint doesn't recover only while you're exercising. Poor sleep can make pain feel louder and can leave you stiffer the next day, which makes movement less appealing. Set a consistent bedtime, keep the room cool and dark, and stop using screens 30 minutes before sleep. A pillow and mattress arrangement that keeps your spine neutral can also reduce strain on sore shoulders, hips, and knees.
Food won't rebuild damaged cartilage, but it can support a routine that makes activity and weight management easier. Build meals around vegetables, fruit, fatty fish, nuts, beans, olive oil, and enough protein. Reduce ultra-processed foods, sugary drinks, and excess alcohol. The point isn't to follow a perfect diet. It's to make the average meal work in your favor.
Treat supplements as secondary
Omega-3 fats and vitamin D may help some people, but the evidence is modest and supplements can interact with medications or be inappropriate for certain health conditions. Food comes first. For a focused overview of omega-3 considerations, NZ Supps joint support info is a useful starting resource, but discuss supplementation with a clinician or pharmacist if you take regular medication.
Weight management deserves direct attention when osteoarthritis affects a person with overweight or obesity. The British Dietetic Association's osteoarthritis nutrition guidance states that losing at least 10% of body weight provides the greatest benefit for symptoms and overall health. It also emphasizes combining dietary changes with activity rather than relying on exercise alone.
Don't turn tracking into punishment. Record weekly movement minutes, the number of exercise sessions, sleep quality, and which tasks trigger symptoms. That information is more useful than obsessing over every calorie because it shows whether your routine is improving what you actually need to do.
You can also review practical sleep habits that may accelerate healing. A better night won't fix a painful joint by itself, but it can make the next day's movement plan easier to follow.
Your Starter Week and What to Do If Pain Persists
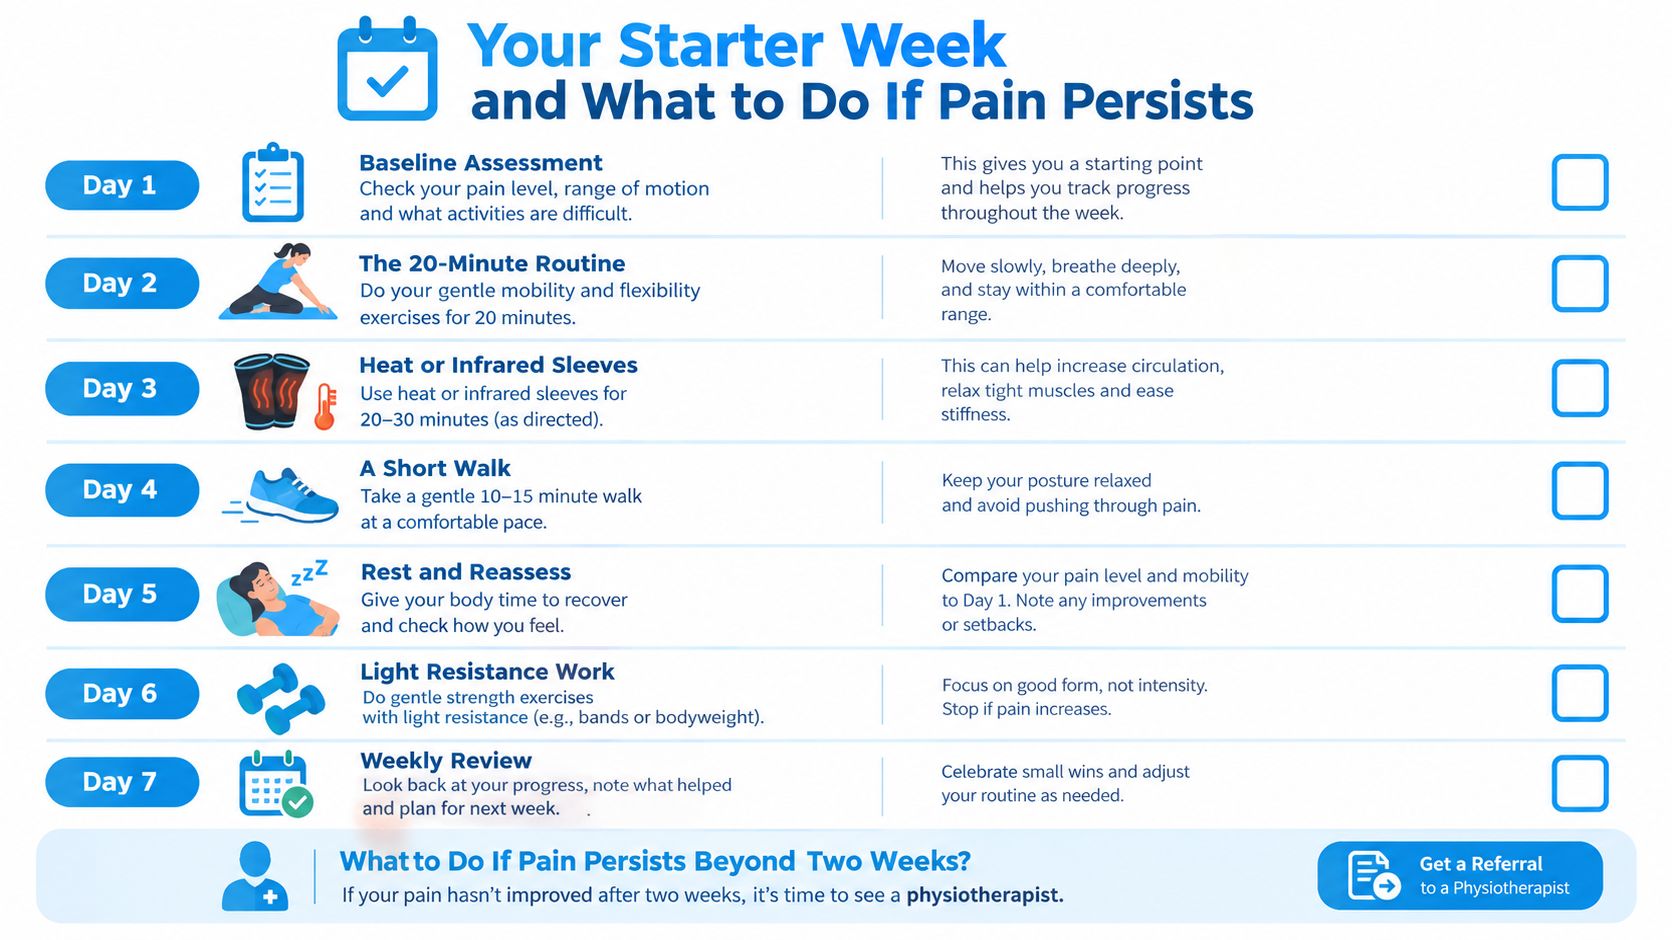
Use the first week to collect information, not to prove how much discomfort you can tolerate. Keep the routine deliberately small and write down the joint involved, the activity, the support used, and how you feel that evening and the next morning.
Seven days of practical adjustments
- Day 1: Record your baseline. Note morning stiffness, swelling, walking tolerance, range of motion, and the tasks you're avoiding.
- Day 2: Perform the gentle exercise routine. Stop short of sharp pain and focus on controlled breathing.
- Day 3: Add warmth before movement or a properly fitted infrared-style sleeve during light activity if warmth helps.
- Day 4: Pace one real chore, such as grocery shopping. Split the load and stop before your gait changes.
- Day 5: Improve sleep conditions and make one meal more nutrient-dense, with vegetables and a reliable protein source.
- Day 6: Progress only the exercises that have remained comfortable. Add repetitions or light resistance selectively.
- Day 7: Review patterns. Identify which movement, recovery method, task modification, or sleep change helped and which one increased symptoms.
Know when self-management isn't enough
Arrange a clinician visit if morning stiffness persists for more than 45 minutes, swelling doesn't resolve within three days, pain interrupts sleep every night, or your range of motion is declining. Seek prompt medical help for a hot, markedly swollen joint, sudden inability to bear weight, major injury, fever with joint symptoms, or new weakness or numbness.
Primary care can coordinate the first assessment and investigate broader causes. A physical therapist can tailor strengthening, gait, and pacing strategies. Rheumatology is appropriate when symptoms suggest inflammatory arthritis or affect multiple joints in a pattern that doesn't fit ordinary mechanical pain. Orthopedics can assess structural problems, persistent loss of function, or cases where surgical options need discussion.
For additional flare-specific ideas, use this resource on joint pain flare-up relief. Bring your weekly notes to the appointment. A clear record of triggers, swelling, sleep disruption, and response to movement gives the clinician something more useful than a general statement that the joint “just hurts.”
Thermo Recovery Wear offers compression-lite and infrared-responsive sleeves and braces for joints including the knee, ankle, wrist, elbow, shoulder, and back, intended for warmth and support during rest or light activity. Visit Thermo Recovery Wear to explore the available options and choose a recovery aid that fits your layered joint-pain routine.


