


Your wrist and thumb are sore, but the brace feels almost as awkward as the pain. You slide your hand into the opening, tighten the straps because the support feels loose, and then notice tingling in your fingers while you type. That usually means the brace is positioned or tensioned poorly, not that you just need to "get used to it."
Learning how to wear a wrist brace with thumb support means balancing stability, circulation, comfort, and useful hand movement. A properly fitted thumb spica can protect a painful joint during selected activities, but wearing it continuously without movement breaks can create a different problem: a stiff, weaker hand.
Table of Contents
- Understanding Thumb Spica Brace Basics
- The Correct Sequence for Putting It On
- Managing Daily Wear Times and Muscle Health
- Adjusting Fit for Swelling and Hand Shapes
- Upgrading to Infrared Recovery Wear
- Essential Wear Care and Safety Reminders
Understanding Thumb Spica Brace Basics
A thumb spica wrist brace is more than a soft wrist wrap. A typical design uses Velcro straps and an internal metal splint to stabilize the wrist, while the thumb extension supports and limits movement at the painful thumb joint. That construction can be useful when pain comes from the thumb base, the thumb tendons, repetitive use, or a wrist problem that worsens when the thumb moves.
A standard wrist wrap usually focuses on the wrist alone. A thumb spica adds a shaped section that holds the thumb in a more controlled position. The support needs to sit in the correct place, because a brace that misses the painful joint may feel tight without doing much useful work. The NHS description of wrist braces and thumb spica supports explains this difference and warns that prolonged continuous wear can weaken hand muscles.
What the thumb section should do
The thumb section should support without crushing. Your thumb should rest inside the tunnel, sleeve, or opening with enough room for normal circulation. The brace should limit the movement that aggravates your symptoms, while your fingers remain available for safe light tasks.
Pain at the thumb base often calls for careful alignment around the web space and the base of the thumb. If the pain is mainly at the wrist, the wrist portion may need to sit centrally while the thumb extension provides only light guidance. Don't force the thumb into a position that feels sharply painful. A splint is meant to reduce unwanted movement, not create a new pressure point.
Practical rule: A brace should feel supportive when you relax your hand. If you have to grip against it, fight the thumb tunnel, or tolerate increasing pressure to keep it in place, the fit needs attention.
The Royal College of Occupational Therapists guideline summarizes evidence supporting hand orthoses for thumb carpometacarpal osteoarthritis, while also noting trade-offs such as reduced dexterity with some wrist splints. That distinction matters in daily life. A brace may be appropriate for a painful activity, but the most rigid option isn't automatically the right choice for typing, cooking, or resting.
For a useful comparison of support devices, read this guide to braces versus wraps explained. If your symptoms center on the thumb joint, this resource on thumb joint pain support can help you think about support alongside activity modification.
The Correct Sequence for Putting It On
Most fitting problems start before the first strap is closed. People often bend the wrist, pull the thumb section into place, and tighten whichever strap is easiest to reach. That approach can pull the brace off-center and leave the thumb supported in the wrong position.
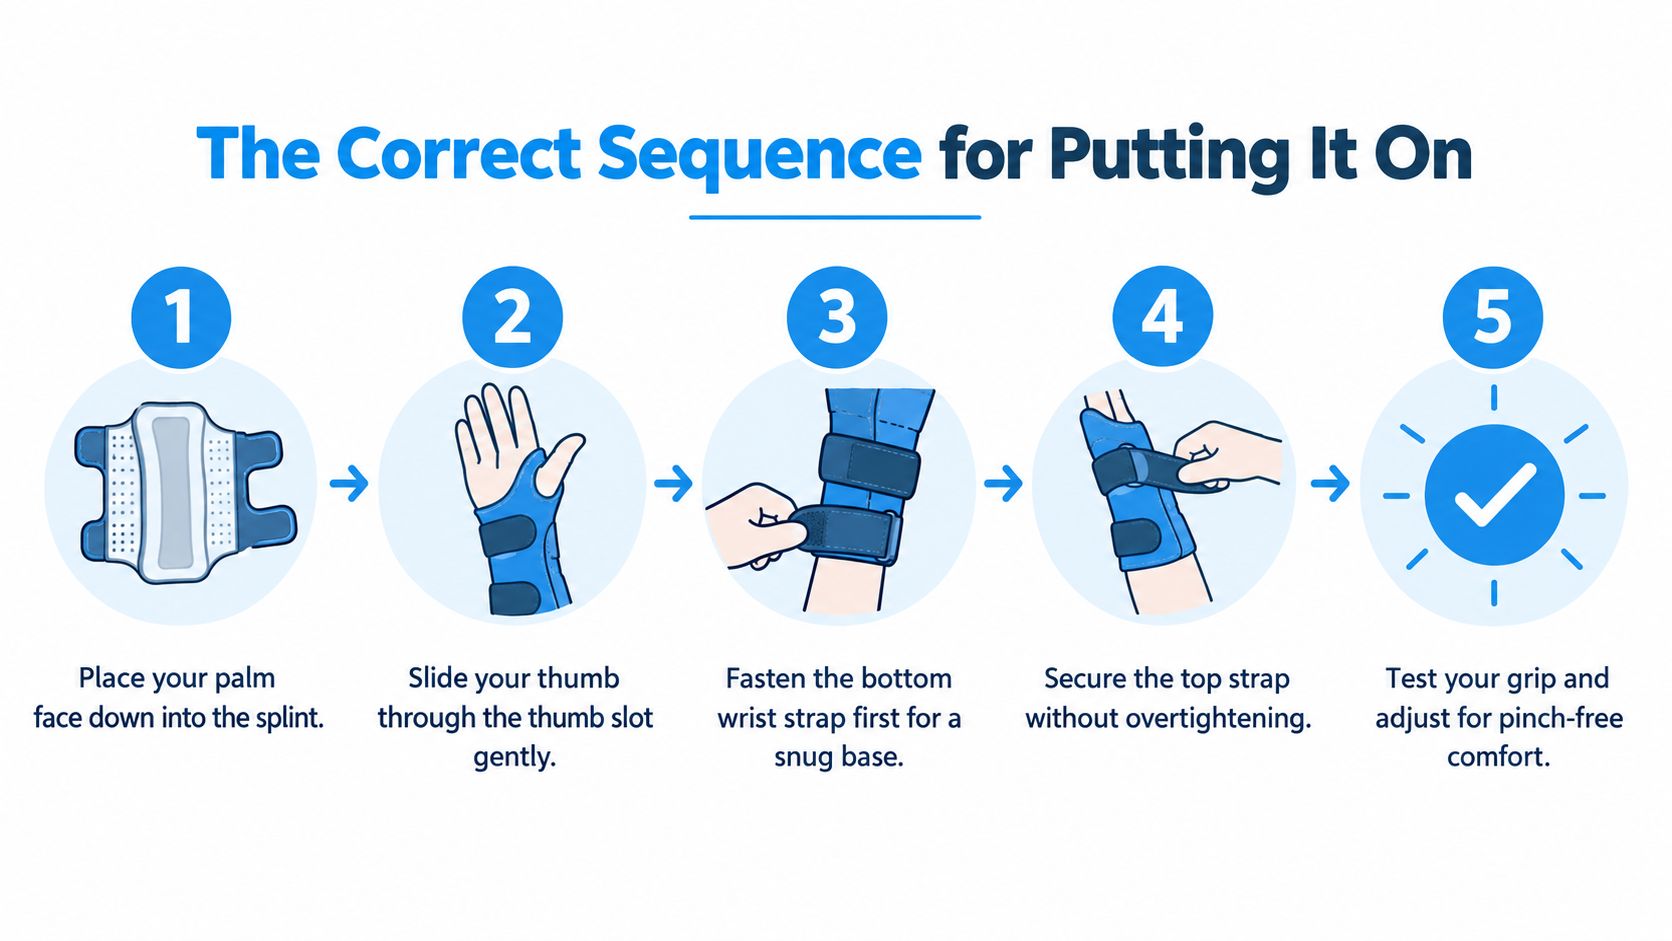
Position the hand first
- Start neutral. Rest your forearm on a table with the wrist as straight as is comfortable. Don't begin with the wrist bent forward or backward, because the brace may hold that bent position once fastened.
- Find the thumb opening. Slide the thumb gently into the tunnel, stockinette, or cutaway. Don't force the thumb through a narrow opening, and don't twist the brace to make the opening reach you. If the thumb section sits against the side of the thumb rather than around it, remove the brace and reposition it.
- Secure the wrist base. Fasten the lower wrist strap first. This creates the foundation that keeps the brace centered over the wrist instead of allowing the thumb extension to drag the whole support sideways.
- Close the forearm strap. Secure the upper strap next, firm enough to stop shifting but not so tight that it leaves a deep groove. The thumb strap comes later, because tightening it first can pull the thumb into an uncomfortable angle.
- Set the thumb tension. Adjust the thumb strap until the thumb feels held, not squeezed. Check that the fingers can move freely and that the brace doesn't pinch the web space between the thumb and index finger.
A useful fit check is the one-finger test. Patient instructions summarized in clinical guidance on wrist and thumb splint fitting commonly use the ability to slide about one finger between the brace and skin as a practical benchmark. The brace should be firm, easy to remove, and free of sharp pressure.
Now slowly open and close the fingers. Test a relaxed grip, then release it. Your fingertips shouldn't become unusually pale, blue, cold, or numb. If the brace rubs immediately, loosen it and inspect the edge rather than assuming the skin will adapt.
For another example of careful brace positioning, see this guide on how to wear an elbow brace.
Watch the application process here for a visual demonstration:
Managing Daily Wear Times and Muscle Health
A brace can make a work task easier by limiting the movement that provokes pain. It can't replace movement entirely. The practical challenge is fitting support into a full day without keeping the wrist and thumb immobilized from morning to night.
The clearest safety point in the NHS guidance is that you shouldn't wear a thumb spica for longer than two hours at a time without removing it to move the wrist, because prolonged continuous wear may weaken hand muscles. The same guidance describes daytime use for activities and short rest periods, rather than unrestricted, uninterrupted wear.
That doesn't mean you must remove the brace in the middle of a risky task. It means you should plan the day around purposeful wearing periods and lower-risk breaks.
Match the brace to the task
Use the brace when the activity predictably increases symptoms or requires repetitive thumb movement. For example, it may be useful during a short typing block, a drive, food preparation, or a chore that involves gripping. Remove it for a planned movement break when you can safely rest the hand.
A workable routine looks like this:
- Before work: Put the brace on while the wrist is calm and check the thumb position before you begin.
- During repetitive work: Keep the support on for the task if it reduces painful motion, but avoid tightening it progressively as the hand becomes tired.
- During a safe pause: Remove the brace, relax the fingers, and move the wrist gently through a comfortable range.
- Before the next task: Recheck the skin, finger color, sensation, and strap position rather than putting the same tension straight back on.
If you haven't worn a splint recently, begin with a short trial of about 15 minutes, then increase toward a couple of hours as tolerated, following the gradual approach described in patient splinting guidance. A short trial tells you more than a full day of discomfort. It exposes rubbing, pressure, and poor thumb alignment while you can still correct them.
Protect movement, not just comfort
During removal breaks, keep movements gentle. Open and close the fingers without force, let the thumb move only within a comfortable range, and avoid aggressive stretching into pain. If a clinician has given you specific exercises, use those instructions. General strengthening advice shouldn't override a plan for a fracture, acute injury, or post-operative recovery.
The Royal College of Occupational Therapists guideline notes that wrist splints may reduce pain in rheumatoid arthritis and may produce a moderate improvement in grip strength, while dexterity can suffer and some evidence remains limited. In practice, that means the right brace is the one that supports the needed activity without making every hand task clumsy. You can review wrist strengthening exercises as a general educational resource, but seek individual advice when your diagnosis or symptoms are unclear.
Stop using the brace and seek professional advice if pain, swelling, pins and needles, or skin changes increase. A schedule that looks reasonable on paper isn't safe if your hand is telling you the fit or treatment plan is wrong.
Adjusting Fit for Swelling and Hand Shapes
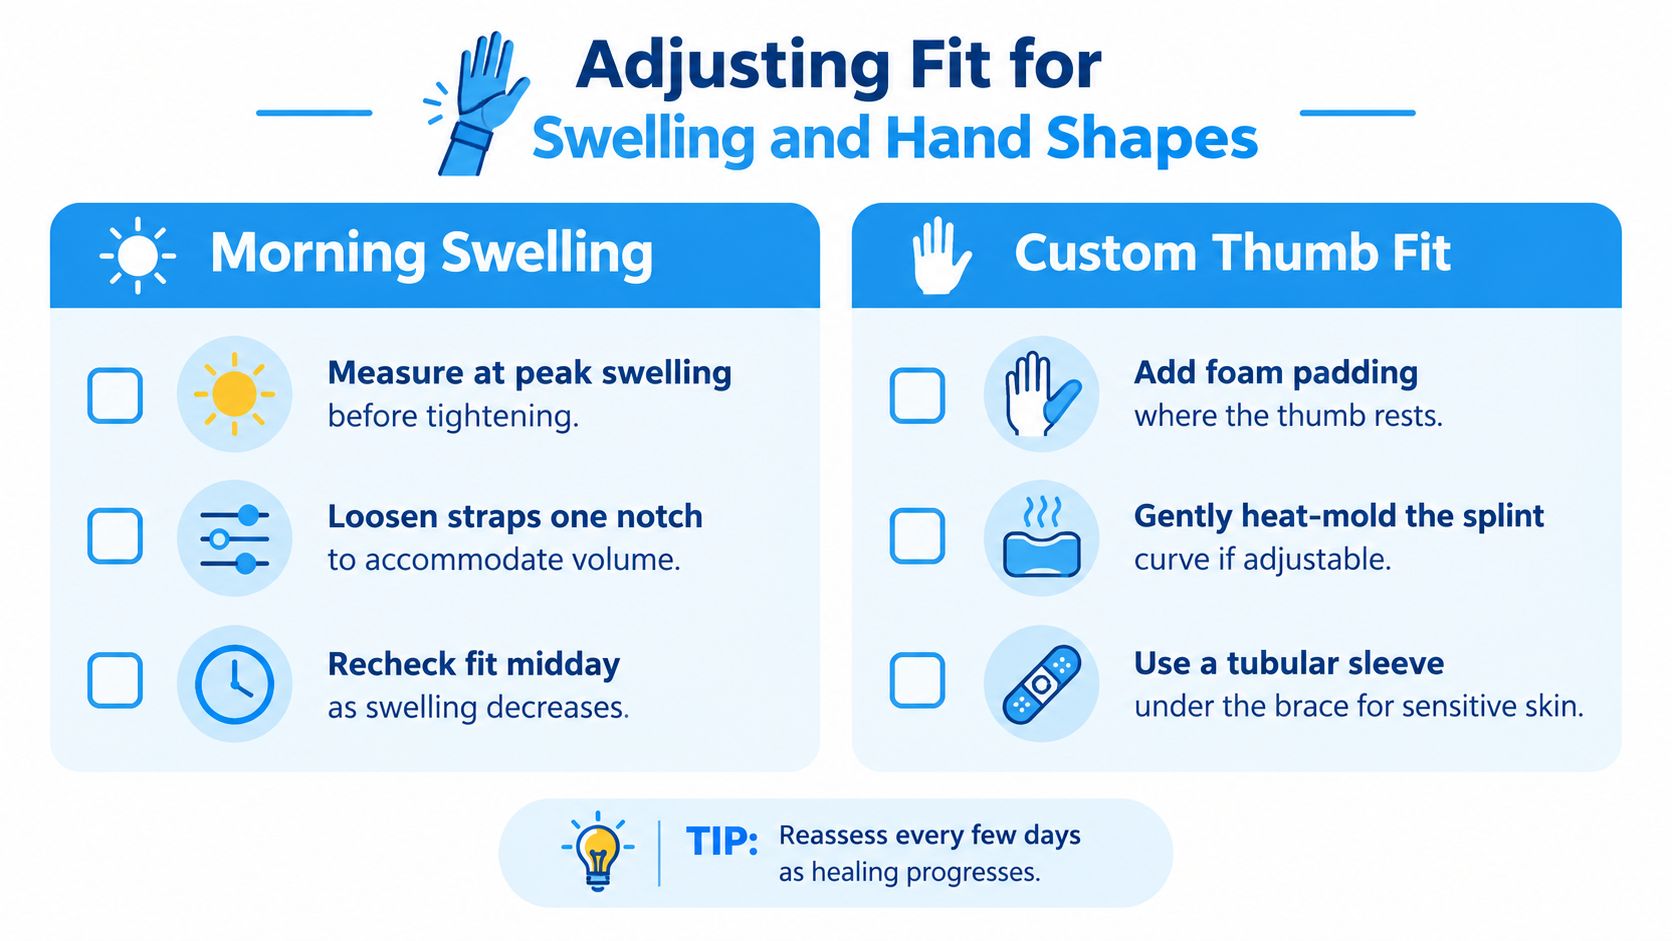
A brace that fits comfortably in the afternoon may feel too tight in the morning. Swelling changes the available space around the wrist, thumb, and fingers, and a pre-shaped thumb section may not match every hand. Tightening the straps to compensate can create pressure without improving alignment.
Start with the location of pain
If pain is concentrated at the thumb base, center the thumb support around that joint and make sure the web space isn't being pulled sideways. The wrist strap should stabilize the brace without forcing the thumb section away from the hand. You may need less thumb tension than you expect, because the rigid section is already limiting movement.
If pain is mainly at the wrist, center the wrist splint over the wrist joint first. Let the thumb extension sit naturally rather than using it to pull the entire brace into place. A thumb spica isn't automatically the best device for wrist-only symptoms, particularly if the thumb section interferes with work or grip.
For morning swelling, loosen the straps before you put the brace on and adjust them gradually after the hand is settled. Don't wrap extra material tightly around an already swollen area. A thin, smooth layer under the brace may reduce rubbing, but it shouldn't create folds beneath pressure points.
Treat warning signs as fitting information
Remove the brace and inspect your hand if you notice:
- Persistent marks: Red marks lasting longer than 20 minutes are a reason to stop and seek advice, according to NHS patient guidance.
- Nerve symptoms: Pins and needles, numbness, or a burning sensation may indicate pressure on a nerve or poor positioning.
- Circulation changes: Pale, blue, or unusually cold fingers need prompt attention.
- Worsening symptoms: Increased pain or swelling means the brace isn't behaving as helpful support.
- Mechanical irritation: Rubbing at the thumb web space, wrist crease, or brace edge usually requires repositioning or a different size.
If you have limited grip strength, use a table edge to stabilize the brace while guiding the thumb through. A brace that can only be applied with force or two hands may not be practical for independent use. Test the application before wearing it outside, and check whether it catches on tools, clothing, or sports gloves.
Don't heat-mold a splint or add thick padding unless the device instructions or a qualified clinician specifically allow it. An occupational therapist can adjust a brace more safely when swelling, unusual hand shape, or joint deformity makes a standard fit unreliable.
Upgrading to Infrared Recovery Wear
A rigid thumb spica has a specific job: it limits motion. That makes it useful when movement is aggravating an injury or painful joint, but it also makes the brace less convenient for sleep, light movement, and sensitive skin. Velcro edges, a metal stay, and a fixed thumb position can interfere with clothing, tools, keyboard use, and natural hand posture.
Choose support according to the phase of recovery
Rigid splinting is generally the more appropriate choice when a clinician has told you to restrict movement, when a joint needs clear stabilization, or when a specific thumb position is part of treatment. A softer recovery sleeve isn't a substitute for that instruction. It won't provide the same immobilization, and treating it as though it does can leave an injury under-supported.
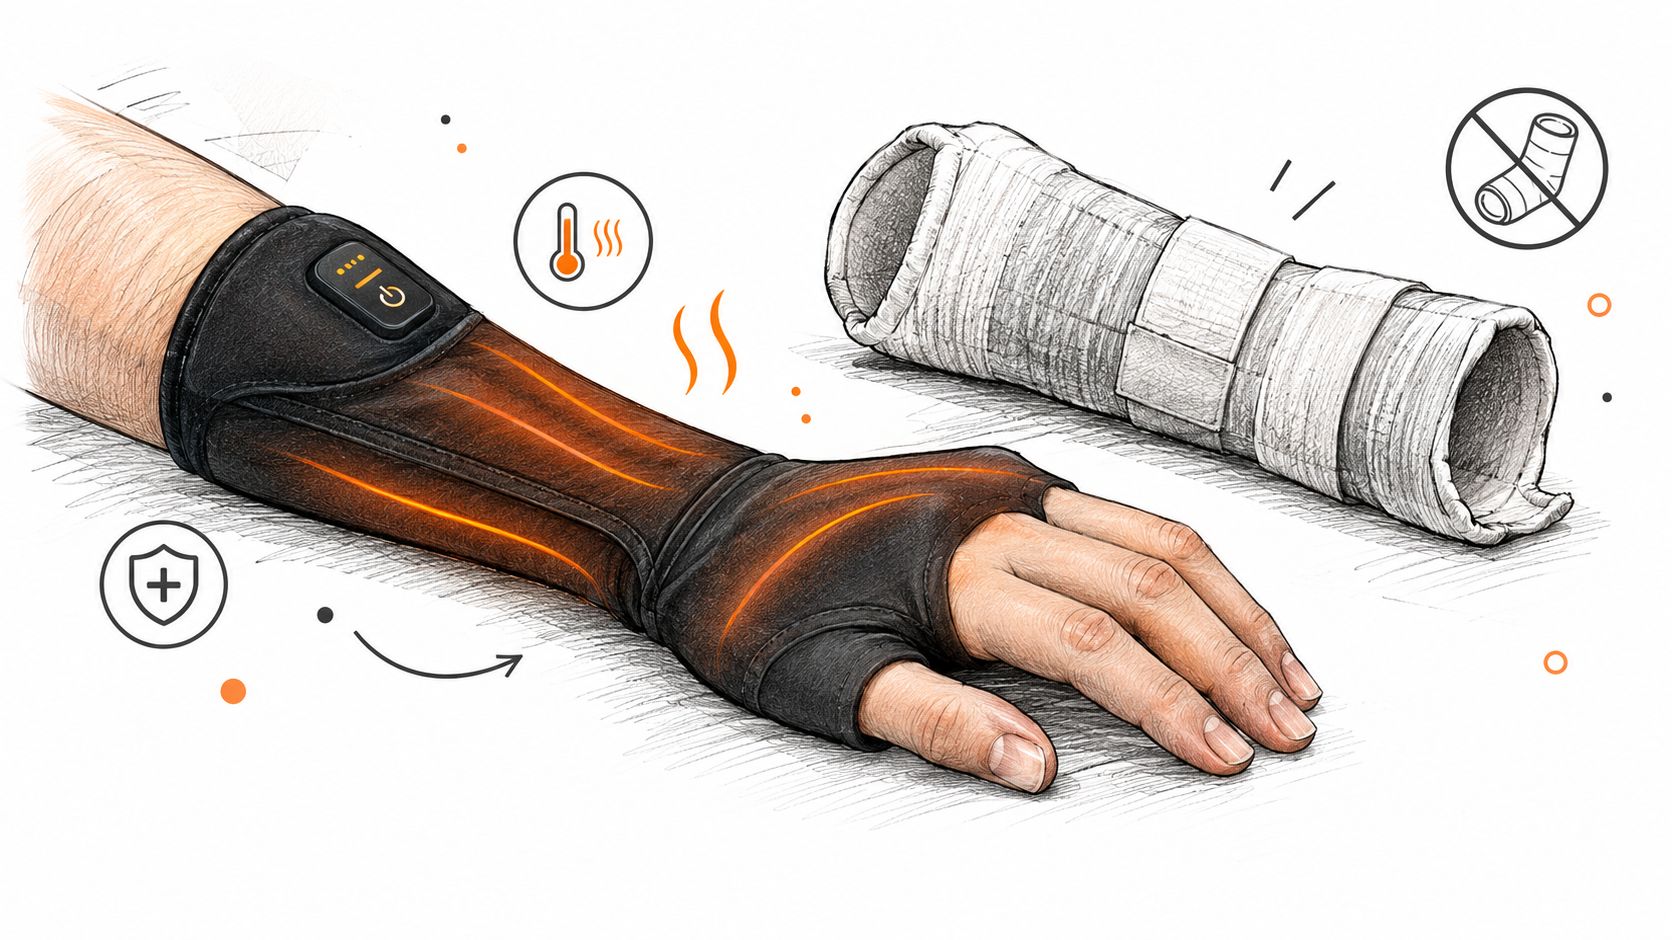
For maintenance, light activity, or periods when rigid straps irritate the skin, a compression-lite recovery garment offers a different compromise. Infrared-responsive textiles may use semiconductor-integrated fibers, while bamboo and charcoal blends are designed around moisture handling and thermal comfort. The aim is a wearable layer that supports warmth and comfort without the hard structure of a medical splint.
That option can make sense when the priority is:
- Light movement: You need to move the hand naturally rather than lock the thumb in place.
- Rest periods: You want a less bulky layer during quiet activity.
- Sensitive skin: Strap pressure and repeated rubbing are limiting your brace use.
- Consistent wearability: You need support that fits beneath ordinary clothing or doesn't interfere with daily tools.
The trade-off is straightforward. A rigid brace offers more control but less freedom. A flexible recovery sleeve offers more freedom but less immobilization. Don't use a flexible garment for a task that requires the motion restriction of a prescribed splint.
Before choosing an infrared option, review the manufacturer's sizing, material, and wear instructions. This overview of infrared therapy for beginners and pain recovery can help you understand how this category differs from a conventional orthosis. If your pain remains significant, or if you need a brace to feel safe during ordinary movement, ask a clinician to reassess the underlying problem instead of just changing materials.
Essential Wear Care and Safety Reminders
A well-fitted brace can still cause trouble if it stays damp, dirty, or structurally damaged. Keep your hand and wrist dry before application, especially after washing, and follow the care instructions for the specific brace. Don't machine-wash a splint with a metal stay unless the manufacturer explicitly says it's safe.
Use a simple daily check:
- Inspect the skin: Look for rubbing, persistent redness, swelling, or irritation after removal.
- Check the structure: Make sure the metal support, seams, thumb tunnel, and fasteners haven't bent or degraded.
- Clean appropriately: Wash removable fabric components according to their label, then let them dry fully before use.
- Assess the fit: Swelling, weight changes, and healing can alter how the same brace sits.
- Review the purpose: Use rigid support for the activity or treatment reason it was prescribed, not automatically for every hour of the day.
The NHS advises removing the splint to move the wrist rather than wearing it continuously beyond the recommended interval. Stop and seek advice for lasting red marks, increased pain, swelling, or pins and needles. If your fingers change color or sensation, remove the brace promptly and get clinical guidance.
A recovery sleeve may be reasonable for light support after a clinician has confirmed that full immobilization is no longer needed. For cleaning and material-specific guidance, consult wear-care instructions for recovery garments. Persistent pain, worsening function, or uncertainty about the diagnosis calls for an occupational therapist, physical therapist, or doctor review.
Thermo Recovery Wear offers compression-lite, infrared-responsive wrist sleeves and braces for people who need a less restrictive option during light activity or recovery maintenance. Visit Thermo Recovery Wear to review the available support designs, sizing guidance, and care instructions before choosing your next layer.


